
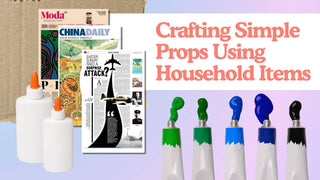
Introduction
When it comes to cosplay, it’s not just about the costume—it’s about the details that bring your character to life. While some props can be pricey or hard to find, you don’t need to spend a fortune on intricate accessories. With a little creativity and some household items, you can craft amazing props that are both budget-friendly and unique. Whether you’re a cosplay beginner or an experienced enthusiast, these DIY prop ideas will help you level up your look with ease. Let’s dive into some simple, cost-effective ways to make props using everyday items!
1. Paper Mâché Weapons: Easy, Lightweight, and Customizable
Why it's perfect:
Paper mâché is a fantastic material for crafting lightweight, customizable props. It's inexpensive, easy to work with, and can be molded into various shapes, from swords to shields to magical staffs.
What you’ll need:
-
Newspapers or paper towels
-
Flour or glue (for the paste)
-
A balloon or cardboard tube (for shaping)
-
Paint (for finishing touches)
How to make it:
-
Tear your newspaper into strips and set aside.
-
Mix flour and water or use glue to create a paste.
-
Dip the newspaper strips into the paste, then apply them over a balloon or cardboard form (such as a rolled-up tube for a sword or staff).
-
Layer the paper strips and let the mixture dry completely.
-
Once it’s dry, pop the balloon and shape the prop to your liking. Sand it down if needed for a smoother finish, then paint it to match your character’s weapon.
Pro Tip: To make the prop even sturdier, consider adding a layer of tape or using a wire for reinforcement. For added realism, paint the prop with metallic or weathered effects for a battle-worn look.
2. Foam Armor Pieces: Lightweight and Durable
Why it's perfect:
Foam is one of the easiest and most versatile materials for creating cosplay armor. Whether you’re crafting gauntlets, shoulder pads, or even full armor, foam is a great option because it’s lightweight, easy to cut, and can be painted to look just like metal.
What you’ll need:
-
Craft foam or pool noodles
-
Scissors or a craft knife
-
Hot glue gun or fabric glue
-
Paint (acrylic works best)
How to make it:
-
Cut foam into the desired shapes for your armor (use templates or freehand it).
-
Heat the foam with a heat gun to make it pliable. Once soft, mold it to the shape you need (e.g., bending it to create a curved shoulder pad).
-
Attach pieces together with hot glue.
-
Once assembled, paint the foam in the color and texture that matches your character's armor—whether it's metallic silver, bronze, or a more weathered look.
Pro Tip: Adding detail with metallic paint or even using black paint to create a "distressed" look will make your armor appear more realistic and movie-quality!
3. Cardboard Shields and Swords: Quick and Sturdy
Why it's perfect:
Cardboard is a staple for DIY props and can be transformed into fantastic weapons like shields and swords. It’s a durable material that’s easily shaped and painted to fit any cosplay.
What you’ll need:
-
Cardboard (a pizza box or shipping box works great)
-
Scissors or a craft knife
-
Paint or markers
-
Decorative elements (like buttons, fabric, or metallic tape)
How to make it:
-
Cut the cardboard into the desired shape (a round shield or a sword shape).
-
If you’re making a shield, cut two layers of cardboard for thickness and strength, then glue them together.
-
For a sword, use a long piece of cardboard, trimming it to the size you want and reinforcing it with extra cardboard layers.
-
Decorate the prop with paint, and use fabric or metallic tape for extra detail. You can also add a handle or strap using string or fabric.
Pro Tip: For extra realism, wrap the handle in fabric or leather strips, and use duct tape for a weathered effect.
4. Plastic Bottle Prop Replicas: From Guns to Magical Items
Why it's perfect:
Plastic bottles are surprisingly versatile and can be used to craft props that look like futuristic weapons, magic wands, or even potions. By cutting, painting, and adding extra embellishments, you can easily transform them into cosplay essentials.
What you’ll need:
-
Empty plastic bottles (water, soda, or shampoo bottles)
-
Scissors or a craft knife
-
Hot glue gun
-
Paint (acrylic or spray paint)
How to make it:
-
Cut and shape the plastic bottle into the desired form (you can use the bottom of the bottle to make a potion bottle or trim a bottle to create a futuristic gun).
-
Sand down any rough edges to make them smooth.
-
Paint the bottle to match the colors and textures you need for your character’s prop.
-
Add embellishments like glitter, beads, or metallic tape to complete the look.
Pro Tip: For magical props like potion bottles, you can fill the bottles with colored liquid (colored water or food coloring works great) to give them an authentic "magical" glow.
5. Old Clothing for Capes, Cloaks, and Tunics
Why it's perfect:
You don’t need to buy expensive fabric to make a dramatic cosplay cape or cloak. Old clothing items like sheets, old t-shirts, or even scarves can be repurposed to create dramatic flowing garments for your character.
What you’ll need:
-
Old clothing (shirts, sheets, scarves, etc.)
-
Scissors or fabric shears
-
Needle and thread or fabric glue
-
Decorative elements (optional, like lace, beads, or a brooch)
How to make it:
-
Cut the fabric to the desired size for a cloak or cape. You can cut a sheet in half and hem the edges to create a simple cloak.
-
If you want to create a tunic, use an old shirt or sweater, cutting it to match the shape and size of your character's costume.
-
Add decorative elements like lace, ribbons, or a brooch to finish off the look.
Pro Tip: If you’re working with fabric that frays, be sure to hem the edges to prevent them from unraveling. A brooch or a knot can help secure the fabric in place to keep the cape or tunic in the perfect shape.
Conclusion
Crafting your own cosplay props doesn’t have to be a costly or complicated process. With everyday household items like cardboard, plastic bottles, and foam, you can create impressive accessories and weapons that will make your cosplay stand out. The key is to be resourceful and creative, making the most of what you already have. Whether you’re crafting a sword, a shield, or a magical potion, DIY props are the perfect way to bring your character to life without breaking the bank. So, grab your scissors and start crafting—your next cosplay masterpiece is just a few household items away!