
For some people, nails are just part of getting ready. For DIY beauty lovers, they are part of the creative process.
If you love mood boards, nail art, craft projects, beauty tutorials, outfit planning, color palettes, tiny details, and the satisfaction of making something feel like your own, press-on nails are one of the most fun beauty products to play with. They give you a finished manicure look, but they can also become a starting point for personalization.
You do not have to be a professional nail artist to create a manicure that feels thoughtful, styled, and unique. With the right base set, a few accents, and a little planning, press-on nails can become part of your self-care routine, your outfit styling process, or even a girls’ night activity.
EyeCandys handmade press-on nails make it easy to get a polished look at home while still giving creative beauty lovers room to experiment with color, shape, styling, and personal expression.
Why Press-On Nails Are Perfect for Creative Beauty Routines
DIY beauty is not just about saving money or skipping appointments. For a lot of people, it is about the joy of creating the look yourself.
There is something satisfying about choosing the colors, planning the vibe, laying out the set, applying each nail, and watching the whole manicure come together. It feels personal in a way that a rushed salon appointment does not always allow.
Press-on nails are especially good for creative beauty routines because they give you flexibility. You can choose a set for your outfit, your mood, your plans, or your current aesthetic without committing to the same manicure for weeks. You can keep things simple one week with a soft nude or French tip, then switch to chrome, florals, rhinestones, or bold color the next.
They also make nail art feel more accessible. Instead of trying to paint tiny details with your non-dominant hand, you can start with a handmade set that already has shape, color, and design built in. From there, you can style the manicure around your outfit or add small custom touches if appropriate.
For DIY beauty lovers, press-ons can feel like the best of both worlds: polished enough to look finished, flexible enough to make your own.
Start With a Strong Base Style
Every great customized manicure starts with a good base. Before you think about extra details, choose a press-on set that already fits the mood you want.
A base style can be simple or bold. The point is to choose something that gives you a foundation to build from. If you want a romantic manicure, start with soft pink, pearl, lavender, milky white, or floral press-ons. If you want something dramatic, look for black, burgundy, chrome, deep red, or cat-eye styles. If you want a playful look, try bright colors, pastel mixes, graphic designs, or jelly finishes.
Think about the overall direction before choosing the set. Do you want your nails to feel soft and dreamy? Bold and editorial? Cute and colorful? Dark and moody? Clean and minimal? Matching your base style to the overall vibe makes any added details feel more intentional.
Good base styles for customization include nude, sheer pink, French tips, milky white, soft square, almond, chrome, jelly colors, solid glossy shades, and simple hand-painted designs. These give you room to style the rest of the manicure without the look feeling too busy.
If you already love detailed nails, you can start with a more decorative base. A floral, cat-eye, shimmer, or graphic set may not need much added to it. Sometimes customization is not about adding more; it is about choosing the right set and styling it beautifully.
Choose a Color Palette Before You Start
A color palette can make your manicure look more elevated, even if the design is playful. This is especially helpful if you are building the look around an outfit, event, season, or aesthetic.
Start with one main color, then choose one or two supporting shades. For example, if your main color is lavender, you might add pearl and silver. If your main color is cherry red, you might pair it with black and gold. If you are going for a soft spring look, you might choose blush, butter yellow, and mint. For a moody fall look, you might choose chocolate brown, burgundy, and champagne.
A simple color palette keeps the manicure from feeling random. It also makes it easier to decide which accents belong and which ones might be too much.
If you are not sure where to start, pull colors from something you already love. That could be a dress, a makeup palette, a Pinterest board, a flower arrangement, a character design, a vacation photo, or even your favorite coffee shop outfit. Inspiration is everywhere once you start looking for it.
How to Add Decals, Gems, Charms, or Top Coats
If you want to customize your press-on nails, small accents can go a long way. The key is to add details thoughtfully so the manicure still looks polished.
Decals can be a fun way to add personality. Tiny stars, hearts, flowers, butterflies, moons, bows, fruit, or abstract designs can shift the mood of a simple set without requiring hand-painted nail art. They work especially well on solid colors, French tips, nude bases, or milky white nails.
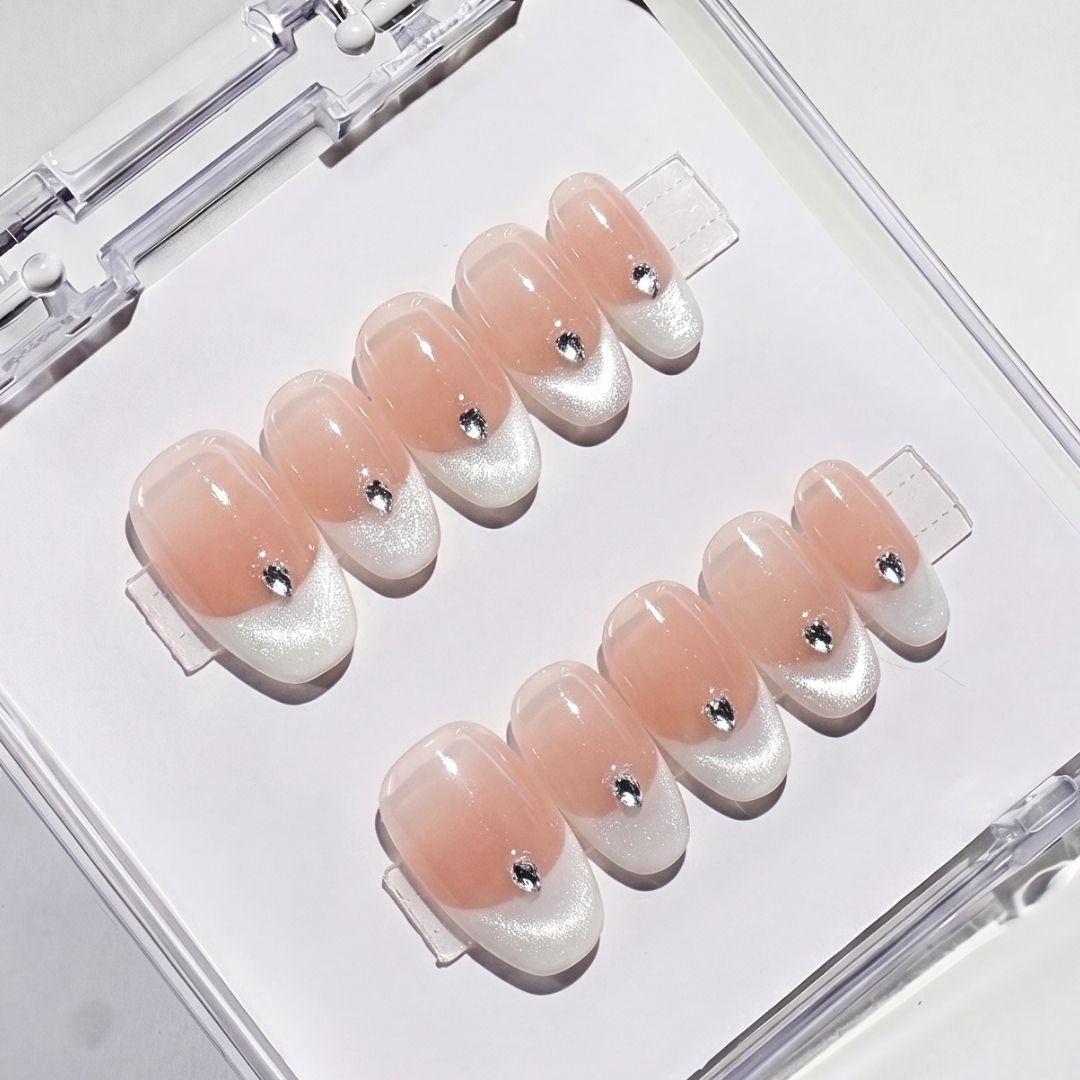
Gems and rhinestones add sparkle and dimension. A single gem near the cuticle can make a nude nail feel more dressed up. A few tiny rhinestones on an accent nail can turn a simple set into party nails. For a bridal or romantic look, pearls and clear gems feel soft and elegant. For a bolder look, metallic studs or colorful gems can make the set feel more editorial.
Charms can be fun for statement nails, cosplay, special events, or photoshoots. They are best used sparingly because they can add weight and may be less practical for everyday wear. If you use charms, think of them as a feature detail rather than something every nail needs.
Top coats can also change the finished look. A glossy top coat can refresh shine. A shimmer top coat can add softness. A matte top coat can make a manicure feel more modern. If you are adding a top coat over handmade press-ons, make sure the formula is compatible with the nail finish and test carefully so you do not dull, smear, or damage the design.
The most important rule is to avoid overloading the nail. Press-ons are meant to sit comfortably on your natural nails. Too many heavy accents can affect the fit, feel, or wear time.
Keep Customization Practical
Creative nails are fun, but they should still work for your plans. A highly decorated set might be perfect for photos, cosplay, a party, or a girls’ night, but it may not be the best choice if you need to type all day, travel, cook, work with your hands, or handle small objects.
Before adding details, think about how and where you plan to wear the nails. If you want a set for everyday wear, keep accents flatter and lighter. Decals, small gems, soft shimmer, or subtle top coats are usually easier to manage. If the nails are for a special event, you can go a little bolder with charms, rhinestones, chrome details, or accent nails.
It also helps to focus the details on one or two nails per hand. Accent nails give you the creative look without making the full set feel too heavy or overwhelming.
A good rule: if the detail makes the nail uncomfortable, hard to wear, or difficult to remove safely, skip it.
Plan a Nail Look Around an Outfit
Matching your nails to an outfit is one of the easiest ways to make a DIY manicure feel styled.
Start by looking at the colors, textures, and mood of the outfit. A soft floral dress might call for blush, lavender, pearl, or tiny flower details. A black outfit might look amazing with chrome, red, glossy black, or rhinestone accents. A denim look can handle almost anything, from white and red to yellow, blue, hot pink, or playful nail art.
You can also match your nails to accessories instead of the clothing itself. Gold jewelry pairs beautifully with warm tones like nude, champagne, coral, red, chocolate, and peach. Silver jewelry works well with pearl, lavender, icy blue, black, white, and chrome. If your bag, shoes, or makeup have a strong color, your nails can echo that shade to pull the look together.
Texture matters too. Satin or silk outfits pair well with pearl, shimmer, or glossy nails. Leather, denim, and structured pieces can handle black, chrome, red, or graphic designs. Soft knits and cozy outfits look beautiful with matte, nude, taupe, burgundy, or chocolate brown nails.
When your nails are planned around the outfit, even a simple look can feel more intentional.
Create a Nail Mood Board
For DIY beauty lovers, a mood board can make the process more fun. It gives your manicure a clear direction before you start applying anything.
Your nail mood board does not need to be complicated. Save a few images that capture the feeling you want: outfits, makeup looks, colors, flowers, interiors, album covers, characters, travel photos, fabric textures, or other manicures. Then look for the patterns.
Maybe everything you saved is soft pink, pearl, and lace. Maybe it is black, silver, and futuristic. Maybe it is coral, turquoise, and beachy. Maybe it is sage green, cream, and gold. Those patterns can help you choose the right press-on set and any accents you want to add.
A mood board can also keep you from adding too many ideas at once. If something does not fit the mood, save it for another manicure. Creative beauty is more fun when each look has its own little story.
Customize Around the Season
Seasonal beauty is a natural fit for press-on nails because you can change the look without committing for weeks.
Spring nails can lean soft and fresh with pastel pink, lavender, butter yellow, mint, baby blue, florals, pearl, and sheer finishes. Summer nails can be brighter with coral, hot pink, glossy white, ocean blue, citrus orange, peach, and shimmer. Fall nails are perfect for burgundy, chocolate brown, olive, burnt orange, taupe, gold, and moody florals. Winter nails can go classic or festive with red, black, silver, navy, pearl, icy blue, glitter, and deep jewel tones.
You can also customize by holiday, event, or trip. A bachelorette weekend might call for chrome or sparkle. A garden party might work with florals and pastels. A beach trip might inspire turquoise, pearl, white, or coral. A cozy fall weekend might call for brown, burgundy, or matte finishes.
Press-ons make seasonal experimenting easy because you can build your look around the moment instead of wearing the same manicure through every plan.
Customize for Cosplay or Character-Inspired Looks
If you love cosplay, character styling, or fandom-inspired beauty, press-on nails are a perfect creative detail. They can help translate a character’s color palette and personality into your manicure without needing permanent nail art.
Start with the character’s main colors. A character with red and black styling might inspire glossy red, black chrome, or flame accents. A soft magical character might call for pink, lavender, pearl, glitter, or tiny stars. A fantasy character could work with emerald, gold, cat-eye effects, or ornate details. A futuristic character might look best with silver chrome, icy blue, holographic finishes, or graphic lines.
Then think about the character’s energy. Sweet characters may suit rounded shapes and soft colors. Villains might work better with sharp almond, stiletto, black, burgundy, or metallics. Elegant characters may call for pearl, nude, French tips, or subtle shimmer. Playful characters can handle mismatched colors, charms, or bright accents.
The nails do not have to be exact replicas of anything from the costume. They just need to support the overall styling. When the nails, makeup, wig, contacts, and outfit all feel connected, the final look becomes much more polished.
How to Store and Organize Press-On Sets
If you love changing your nails often, organization makes everything easier. A few reusable press-on sets can quickly become a tiny nail wardrobe, and you will get more use from them if you store them properly.
After removing your press-ons, clean off any adhesive residue gently and let them dry fully. Then store them in their original display box or a clean storage case. Keeping each set together helps you avoid losing sizes or mixing up designs.
You can organize press-ons by color, season, occasion, or aesthetic. Neutrals and French tips can be your everyday section. Chrome, glitter, and bold colors can be your party section. Florals and pastels can be spring and summer. Burgundy, brown, black, and jewel tones can be fall and winter. Character-inspired or cosplay sets can have their own space.
It also helps to keep application supplies nearby. Store sticky tabs, a nail file, a cuticle stick, alcohol wipes, cuticle oil, and a small pouch together so you are ready when you want to apply a set.
When your press-ons are organized, choosing a manicure becomes part of getting dressed instead of a last-minute search through drawers.
Build a Mini Press-On Nail Wardrobe
If you are creative with beauty, you may enjoy having a few press-on sets ready for different moods and plans.
Start with one everyday set. This could be nude, soft pink, milky white, French tips, or a clean short style. It is the set you can wear with almost anything.
Add one statement set. This could be red, black, chrome, glitter, hot pink, deep purple, or a bold design. It is the set you reach for when you want your nails to be part of the outfit.
Add one seasonal set. This could be florals for spring, coral for summer, burgundy for fall, or shimmer for winter.
Add one creative or themed set. This might be something character-inspired, extra detailed, colorful, or totally different from your everyday style.
With just a few options, you can match your nails to your outfit, mood, or event without needing a new salon appointment every time.
How to Host a Nail Night
Nail time can be more than a beauty routine. It can also be a social, creative, self-care activity.
A press-on nail night is easy to host because everyone can choose a set, prep their nails, apply them together, and help each other with sizing or placement. It is lower-pressure than trying to paint detailed nail art on each other, but it still feels fun and personal.
Set up a small nail station with press-on sets, sticky tabs, nail files, cuticle sticks, alcohol wipes, hand cream, cuticle oil, and any extra accents you want to use. Add snacks, drinks, a playlist, and a movie or show in the background. Let everyone choose a nail look based on their mood, outfit, zodiac sign, season, or upcoming plans.
You can even make it themed. Try a spring pastel nail night, holiday sparkle night, birthday glam night, prom prep night, cosplay nail night, or “match your nails to your outfit” night.
The best part is that everyone leaves with a finished manicure and a little more time spent together. For beauty lovers, that is self-care with a creative twist.
Press-On Nail Customization Mistakes to Avoid
Customizing press-ons should be fun, but a few mistakes can make the final look harder to wear.
Avoid adding too many heavy charms or gems, especially if you want everyday wear. Too much weight can make the nails feel less comfortable. Avoid covering the cuticle area with bulky details, since that can affect the fit. Be careful with top coats, especially if the press-on already has a special finish. Some finishes may not respond well to extra product.
Also avoid customizing before you know which nail fits each finger. Size the set first, then decide where accent details should go. This helps you place gems, decals, or designs in a way that looks balanced once the nails are actually on your hands.
Most importantly, do not sacrifice comfort for decoration. If the nails feel awkward, sharp, heavy, or difficult to remove, the look is not worth it.
Why EyeCandys Handmade Press-Ons Work for Creative Beauty Lovers
EyeCandys handmade press-on nails are a great fit for DIY beauty lovers because they already feel styled, but they still leave room for personal expression.
You can choose a set based on color, shape, finish, occasion, outfit, or mood. You can keep the look as-is for a polished manicure or add small accents if appropriate. Since press-ons can be removed and stored properly for future use, your favorite sets can become part of your creative beauty collection.
They are also convenient. You can get a finished nail look at home without painting every detail yourself, waiting for polish to dry, or booking a salon appointment. That makes them perfect for people who enjoy beauty as a hobby but still want the process to feel easy and flexible.
Final Takeaway: Make Your Manicure Feel Like You
Press-on nails are perfect for DIY beauty lovers because they give you a polished starting point and creative freedom. You can choose a base style, build a color palette, add small details, match your nails to an outfit, plan a mood board, organize your sets, or turn nail time into a girls’ night.
Your manicure does not have to follow anyone else’s rules. It can be soft, bold, romantic, moody, seasonal, character-inspired, or completely your own.
With EyeCandys handmade press-on nails, customizing your manicure look is easy, creative, and low-commitment. Pick your set, style it your way, and let your nails become part of the beauty story you are creating.
Make Your Manicure Feel Like You
EyeCandys handmade press-on nails give you a polished base and the freedom to style it your way. Pick your set and create your look.