Friend to the End: A Chucky Costume and Cosplay Guide
Few horror characters are as recognizable as Chucky. His rainbow-striped shirt, blue overalls, red hair, freckles, bright blue eyes, and childlike doll face create an instantly familiar silhouette.
What makes the costume so effective is the contrast. Chucky is designed to look like a cheerful toy, but his expressions, scars, and behavior reveal something much more dangerous underneath.
That contrast also makes Chucky cosplay accessible at several skill levels. A beginner can build the character with thrifted clothing, a red wig, freckles, blue contacts, and a lightweight prop. Intermediate cosplayers can customize the Good Guy outfit and add controlled damage. Advanced creators can work with prosthetic scars, mismatched eyes, exposed stuffing, reconstructed features, and full doll-box displays.
The first step is deciding which version of Chucky you want to recreate.
Who Is Chucky?
Chucky begins as Charles Lee Ray, a serial killer who transfers his soul into a Good Guy doll.
The Good Guy toy is designed to look harmless and child-friendly, with bright clothing, cheerful branding, red hair, freckles, and large blue eyes. Once Charles inhabits the doll, that friendly appearance becomes part of the horror.
As the story continues, Chucky becomes increasingly expressive, damaged, scarred, and humanlike. Different versions of the character range from a clean and almost innocent-looking doll to a stitched, burned, and reconstructed killer.
Spoiler note: The following costume sections reference Chucky’s later damaged and reconstructed appearances.
Understanding Chucky’s Signature Look
A recognizable Chucky costume should include several core details:
- Red or orange-red hair
- Freckles across the cheeks and nose
- Rounded, rosy doll cheeks
- Rainbow-striped long-sleeve shirt
- Blue denim Good Guy-style overalls
- Bright blue eyes
- Red sneakers or shoes
- Doll-like complexion
- Mischievous or threatening expression
- Optional scars, stitches, dirt, and blood
- Convention-safe knife or toy prop
The striped shirt, overalls, red hair, freckles, and blue eyes are the most important visual anchors. These details should remain visible even in a heavily damaged version.
A costume covered entirely in blood, dirt, or prosthetic wounds may lose the colorful Good Guy design that makes Chucky identifiable.
Choosing Your Version of Chucky
Clean Good Guy Doll
A clean Good Guy doll costume should look polished, colorful, and almost harmless.
Use bright overalls, an undamaged striped shirt, neatly styled red hair, smooth doll makeup, rosy cheeks, freckles, and clear blue contacts.
The horror can come from the expression rather than the clothing. A fixed smile, tilted head, or intense stare can suggest that something is wrong without adding scars or blood.
This is one of the easiest versions for beginners because it does not require prosthetics or extensive distressing.
Classic Possessed Chucky
Classic possessed Chucky keeps the recognizable Good Guy clothing but introduces messier hair, sharper expressions, dirt, and small amounts of damage.
The wig can appear more disheveled, and the makeup can include deeper shadows around the eyes and cheekbones. Add a few carefully placed clothing tears, smudges, or blood stains.
Avoid making the entire costume dirty. The bright stripes and blue overalls should still be easy to see.
Bright blue or sapphire contacts work well for this version because they preserve the innocent doll appearance while the rest of the performance becomes threatening.
Scarred or Reconstructed Chucky
Scarred Chucky is one of the most visually dramatic versions.
This costume can include stitches, burns, cut marks, uneven skin texture, torn clothing, exposed sections of the doll structure, and mismatched eyes.
Plan the facial damage before applying makeup. Concentrating scars on one side can create a more intentional reconstructed appearance than placing random wounds across the entire face.
A bright blue lens in one eye and a cloudy, grey, white-blue, or bloodshot contact in the other can reinforce the asymmetry.
Battle-Damaged Chucky
A battle-damaged version can include dirt, burns, torn overalls, exposed stuffing, damaged hair, fake blood, and cloudy eyes.
The clothing should look worn through specific events rather than randomly shredded. Focus the damage around knees, cuffs, seams, shoulders, and areas that would naturally catch or tear.
Exposed stuffing can be added beneath controlled openings in the costume. Secure it carefully so loose material does not fall around the venue.
Blue-grey, cloudy blue, or bloodshot contacts can make the eyes look aged or injured while keeping some connection to Chucky’s familiar blue gaze.
Glam or Gender-Swapped Chucky
A glam or gender-swapped Chucky costume can reinterpret the Good Guy palette through fashion without losing the character’s core visual cues.
Possible elements include:
- Fitted striped top
- Customized overalls or overall dress
- Cropped denim pieces
- Red platform shoes
- Styled copper or red hair
- Dramatic lashes
- Freckles and rosy cheeks
- Blue or icy-blue contacts
- Stitched nail art
- Fashion-focused horror accessories
The outfit does not need to copy the doll’s proportions literally. The striped palette, blue denim, red hair, freckles, blue eyes, and doll-inspired styling will keep the reference clear.
Beginner Chucky Halloween Costume
A beginner Chucky costume can be assembled from affordable or thrifted pieces.
Start with:
- Rainbow-striped long-sleeve shirt
- Blue denim overalls
- Red sneakers
- Red or orange wig
- Freckle makeup
- Rosy blush
- Optional bright blue contacts
- Lightweight foam knife
Prioritize the most recognizable details before adding wounds or special effects.
A striped shirt and overalls without the red hair and freckles may look like a general doll or children’s costume. Red hair and freckles without the Good Guy clothing may also weaken the reference.
Together, the shirt, overalls, red wig, freckles, blue eyes, and threatening expression create a clear Chucky costume without requiring advanced makeup skills.
Building a Chucky Closet Cosplay
A closet cosplay can use pieces you already own.
A rainbow-striped sweater can replace an exact Good Guy shirt. Standard blue overalls can become more character-specific with colorful buttons, toy-inspired patches, or a handmade Good Guy bib.
Red sneakers, boots, or comfortable red shoes can complete the palette.
Use temporary fabric tape or removable patches when you do not want to permanently alter the clothing.
The transformation should come through the red hair, freckles, doll complexion, blue eyes, and performance. Even a simplified outfit can read clearly when these details are coordinated.
Creating an Intermediate Chucky Cosplay
An intermediate Chucky build can combine customized clothing with basic prosthetic or makeup effects.
Possible upgrades include:
- Handmade Good Guy patches
- Painted or embroidered overall details
- Distressed denim
- Controlled shirt tears
- Styled wig
- Drawn or wax-based scars
- Mismatched contacts
- Handmade foam knife
- Exposed stuffing beneath selected tears
Rather than distressing every part of the costume, choose a story for the damage. One sleeve might be torn and stained, while one knee and one side of the overalls show heavier wear.
This makes the costume feel like it has survived specific events rather than simply being covered in random damage.
Building an Advanced Chucky Cosplay
An advanced Chucky costume can recreate the character’s doll structure and reconstructed face in greater detail.
Possible additions include:
- Sculpted silicone or gelatin prosthetics
- Layered cuts, burns, and stitches
- Artificial doll joints
- Exposed foam or stuffing
- Custom-printed striped fabric
- Hand-painted Good Guy graphics
- Articulated or sculpted doll hands
- Mismatched eye effects
- Mechanized blinking or facial elements
- A collapsible Good Guy box display
Structural pieces should remain lightweight and secure. Any mechanism should be tested repeatedly before it is worn around other people.
Large doll-box props should allow clear airflow, full visibility, and an easy exit. They should not block convention aisles or prevent the wearer from moving independently.
Recreating the Good Guy Overalls
Blue denim overalls form one of the most recognizable parts of Chucky’s costume.
Standard overalls can be customized with:
- Colorful buttons
- Toy-themed illustrations
- Small construction or tool graphics
- A Good Guy-style bib
- Bright decorative stitching
- Playful patches
The exact pattern may vary depending on the version, but the overall effect should feel colorful and child-friendly.
For a clean doll, keep the denim bright and polished. For scarred or damaged Chucky, fade selected areas and roughen the edges of a few controlled tears.
Use fabric paint, appliqué, embroidery, or printable fabric sheets to create custom graphics. Test all paints and adhesives on a hidden section first.
Fake blood should not cover the entire front. Leave enough of the blue denim and colorful designs visible.
Choosing the Striped Shirt
Chucky’s shirt should feature a bright combination of red, blue, green, yellow, and white.
A long-sleeve knit shirt or lightweight sweater generally creates a stronger result than a thin printed T-shirt.
The stripes should remain visible across the sleeves and neckline after the overalls are added.
For a damaged version, distress only selected sections. Roughen a cuff, open a small tear near the shoulder, or add controlled stains around one side.
Keep the overall stripe pattern intact so the shirt remains immediately recognizable.

Styling Chucky’s Red Hair
Chucky’s hair is usually red, orange-red, copper, or auburn.
A clean Good Guy wig should be rounded, smooth, and lightly layered. It should feel toy-like without becoming perfectly helmet-shaped.
Possessed Chucky can have messier, uneven hair with more volume and flyaways. Scarred or battle-damaged versions may include singed sections, bald patches, torn scalp effects, or hair that appears partially detached.
Choose a short or medium-length shaggy wig. A long, glamorous red wig will change the silhouette and may make the costume feel less like Chucky.
Trim the wig gradually and test it with the full makeup. The fringe should frame the face without covering the eyes or scars.
Use wig-safe styling products and avoid spraying them while contact lenses are already inserted.
Creating Chucky Doll Makeup
Begin with a smooth, matte or slightly satin complexion.
The clean doll base can include:
- Rounded rosy cheeks
- Freckles across the nose and cheeks
- Light definition around the nose
- Softly shaped brows
- A slightly glossy or painted-looking lip
- Subtle shading around the eyes
- Gentle contouring around the jaw and temples
Keep the freckles visible. They are one of Chucky’s most recognizable facial details and can easily disappear beneath heavy horror makeup.
A clean Good Guy version should look bright and polished. A possessed version can use deeper shadows around the eyes, sharper cheek definition, and a more severe brow shape.
For a doll-like finish, place blush in a rounded shape rather than sweeping it sharply upward. A small amount of highlight on the cheeks and nose can create a smooth toy-like surface.
Creating Chucky Scars and Stitches
Chucky’s scars are a major part of his later appearances, but they should be planned carefully.
Beginner Scar Makeup
Beginners can draw scars with cosmetic pencils, cream face paint, or skin-safe liquid makeup.
Use red, brown, purple, and muted pink to create depth. Add thin black or dark-brown stitch marks across the cuts.
A small highlight along one edge can make a drawn scar appear raised.
Keep the design concentrated around one or two areas, such as the forehead, cheek, or jaw.
Intermediate Scar Effects
Scar wax can create shallow raised wounds and cut edges.
Apply a small amount to clean skin, smooth the outer edges, and create the cut with a rounded cosmetic tool. Add skin-safe color and fake blood after the wax is secure.
Simple premade prosthetics can also create stitched or torn areas without sculpting from scratch.
Only use adhesives and materials designed for theatrical or cosmetic skin application.
Advanced Prosthetic Damage
Advanced creators can sculpt silicone or gelatin appliances for deeper scars, burns, missing skin, and reconstructed facial sections.
Use multiple textures rather than repeating the same cut. Some areas can look sliced and stitched, while others appear burned, split, or pulled together unevenly.
Plan how the prosthetics will move with facial expressions. An appliance that is too thick or rigid may lift around the mouth and cheeks.
Keep liquid latex, prosthetic adhesive, fake blood, and sealing products away from the eyes.

Choosing Chucky Cosplay Contacts
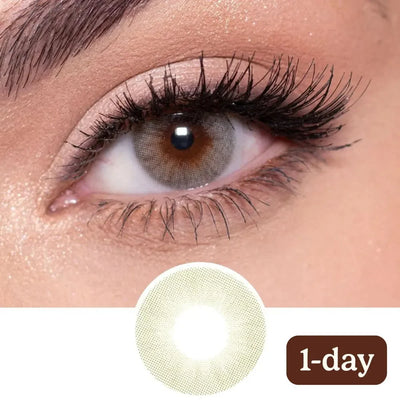
Chucky’s bright blue eyes are part of his signature Good Guy doll appearance. The best contact color depends on whether you are recreating a clean toy, a possessed doll, or a heavily damaged version.
Bright Blue Contacts
Bright blue or sapphire contacts are the most recognizable choice for classic Chucky.
Useful shades include:
- Clear sky blue
- Medium sapphire
- Vivid denim blue
- Cool ocean blue
- Light royal blue
Look for a lens with visible iris texture and enough opacity to remain visible over your natural eye color.
A medium navy outer ring can make the eyes appear slightly larger and more doll-like without creating an extreme anime effect.
Icy Blue Contacts
Icy blue creates a colder and more unsettling doll stare.
Pale blue, silver-blue, glacier blue, and blue-white lenses work well with clean doll makeup or a more supernatural interpretation.
These lenses can suggest that something is wrong beneath the friendly Good Guy appearance without abandoning the character’s familiar eye color.
Enlarging Blue Contacts
Low- or moderate-enlargement circle lenses can make the iris appear larger and more toy-like.
Choose a bright blue design with natural radial lines and a navy border. Avoid extremely large black rings that shift the look toward an unrelated anime or fashion-doll style.
The graphic diameter, or the size of the printed iris, has the greatest effect on how large the eye appears.
Cloudy and Bloodshot Contacts
Cloudy blue, blue-grey, and bloodshot designs work well for injured or battle-damaged Chucky.
A cloudy lens may include white, grey, or faded sections across the blue iris. Bloodshot designs may add red veins while preserving the familiar blue center.
Keep enough blue visible to maintain the character connection.
Mismatched Contacts
Mismatched lenses are especially effective for scarred or reconstructed Chucky.
Possible combinations include:
- One bright blue and one cloudy blue
- One sapphire and one pale grey
- One clear blue and one bloodshot blue
- One icy blue and one white-blue
- One blue lens and one milky white contact
Place the damaged lens on the same side as the heaviest scars or stitches.
Red, Black, and White Contacts
Red, black, and full white contacts are better suited to original horror reinterpretations.
Red can create a demonic or openly possessed Chucky. Black creates an empty, inhuman stare. White or grey can suggest blindness, severe damage, or an undead transformation.
These colors create a strong effect but move the costume away from Chucky’s traditional blue-eyed Good Guy appearance.

Chucky Contact Lens Safety
All colored and decorative contacts are medical devices, including plano lenses without vision correction. In the United States, they require a valid prescription and should be properly fitted by an eye care professional.
Purchase contacts from a seller that verifies prescriptions.
Insert lenses before applying eyeliner, prosthetics, face paint, liquid latex, fake blood, or setting spray. Chucky makeup often places adhesives, synthetic hair, stitches, and blood effects close to the eyes, so careful application is essential.
Never share contact lenses or expose them to tap water. Follow the cleaning, wearing, storage, and replacement instructions for the exact lenses.
Remove the contacts immediately if you experience pain, persistent redness, discharge, unusual light sensitivity, or changes in vision.
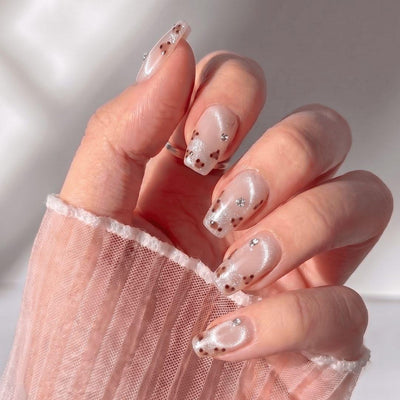
Chucky-Inspired Nail Art
Chucky nail art can carry the Good Guy colors and horror details into the rest of the costume.
Possible designs include:
- Rainbow stripes
- Blue denim patterns
- Red blood drips
- Black stitches
- Good Guy-inspired lettering
- Toy blocks
- Miniature knife silhouettes
- Bright blue doll eyes
- Red and orange flame effects
- Patchwork patterns
A full set could alternate between colorful toy-inspired nails and darker stitched or bloodied accents.
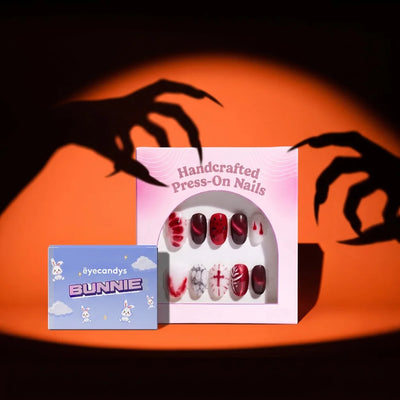
Gel nail stickers can make detailed stripes, stitches, and miniature graphics easier to apply.
Short or medium nails may be more practical when adjusting prosthetics, fastening overalls, handling contact-lens supplies, or carrying a prop.

Choosing a Chucky Prop
A knife is Chucky’s most recognizable prop, but it must be safe and permitted by the venue.
Use foam, flexible plastic, or another convention-approved material. Do not carry a real blade, sharpened metal, or rigid pointed prop.
Other options include:
- Good Guy doll box
- Toy hammer
- Toy accessories
- Lightweight voodoo-inspired materials
- Damaged packaging
- Fake doll parts
- A childlike toy that contrasts with the costume
The prop should support the chosen version. A clean Good Guy doll can carry a toy box or cheerful accessory, while a scarred Chucky may suit a damaged foam knife or broken packaging.
Building a Chucky Doll Box
A Good Guy doll box can turn the costume into a complete presentation.
A beginner version can use a lightweight cardboard frame with colorful toy graphics, character branding, and an open front.
An intermediate display can include side panels, printed toy accessories, and a platform that helps the wearer pose like a packaged doll.
Advanced builders can create a collapsible structure with lightweight clear panels and removable sections.
The box should never seal around the wearer. It must allow clear vision, airflow, and an immediate exit.
Use large box props in designated photography areas rather than carrying them through crowded convention aisles.
How to Pose Like Chucky
Chucky’s posing works best when it combines toy-like stillness with sudden aggression.
Useful poses include:
- Sitting with both hands on the knees
- Standing completely still with a fixed smile
- Tilting the head while looking upward
- Holding a prop behind the back
- Looking innocent before changing expression
- Crouching low with an intense stare
- Reaching one hand toward the camera
- Leaning forward while keeping the feet planted
- Sitting inside a Good Guy box
The expression is essential. Practice a wide doll smile, narrowed glare, suspicious side-eye, and sudden snarl.
Never swing, lunge, or surprise other attendees with a prop. Keep movements controlled in crowded spaces.
Chucky and Tiffany Group Cosplay
Chucky and Tiffany make one of horror’s most recognizable costume pairings.
Chucky should preserve the striped shirt, blue overalls, red hair, freckles, and blue eyes. Tiffany can contrast him with blonde hair, darker fashion, dramatic makeup, and a more glamorous presentation.
The costumes do not have to recreate the exact same scene, but matching the level of damage helps them feel cohesive.
A clean Chucky paired with a heavily scarred Tiffany may look less connected than two costumes with similar aging and distressing.
Other group possibilities include:
- Glen
- Glenda
- Multiple Good Guy dolls
- Charles Lee Ray
- Andy
- Doll and human versions of Chucky
- A larger horror-icon group
Creating the Costume Respectfully
Anyone can cosplay Chucky regardless of gender, race, body type, or age.
Focus on the striped clothing, blue overalls, red hair, freckles, doll makeup, scars, contacts, and performance.
There is no need to change your skin tone or imitate features unrelated to the costume design.
For younger cosplayers, keep props obviously artificial and age-appropriate. Contact lenses should only be used when prescribed, properly fitted, and approved by an eye care professional.
Making a Chucky Costume Comfortable
Test the full costume while walking, sitting, bending, and carrying the prop.
The overalls should allow enough movement through the hips and knees. Choose a breathable striped shirt because denim layers can become warm.
Secure prosthetics without placing adhesive too close to the eyes, nostrils, or mouth.
The wig should not block your vision or catch on the overalls. Trim or pin back any sections that fall across the eyes.
Wear the complete makeup for a test period before the event. This can reveal lifting prosthetics, tight wig areas, irritating adhesives, and places where the clothing rubs against the makeup.
Carry a repair kit containing:
- Makeup
- Skin-safe adhesive
- Cotton swabs
- Safety pins
- Fabric tape
- Wig pins
- Contact-lens supplies
- Fake blood
- Spare patches
- Blister bandages
- Makeup remover
Common Chucky Cosplay Mistakes
One common mistake is choosing a striped shirt without the recognizable rainbow palette. Red, blue, green, yellow, and white should all appear clearly.
Another is wearing plain overalls without any Good Guy-inspired details. Colorful buttons, patches, or a customized bib can make a major difference.
Avoid using a long or glamorous red wig for a classic Chucky costume. The hair should be shorter, shaggy, and doll-like unless you are creating a deliberate fashion interpretation.
Plan the scar placement before applying prosthetics. Random cuts and stitches can make the face look cluttered rather than reconstructed.
Do not cover the entire costume in fake blood. Chucky remains recognizable because the cheerful toy design is still visible beneath the horror.
Red or black contacts can be effective for an alternate version, but bright blue remains the strongest choice for a standard Good Guy or classic possessed Chucky.
Finally, do not forget Chucky’s personality. His humor, suspicious glances, fixed smile, and sudden aggression are as important as the clothes and makeup.
Final Chucky Cosplay Checklist
Before heading to the event, check that you have:
- Rainbow-striped long-sleeve shirt
- Blue Good Guy-style overalls
- Red sneakers
- Red or orange-red wig
- Doll complexion
- Rosy cheeks
- Freckles
- Optional scars and stitches
- Bright blue, cloudy, or mismatched contacts
- Convention-safe prop
- Chucky-inspired nails
- Prosthetic and costume repair supplies
- Contact-lens case and approved solution
- Backup glasses if needed
Your Friend to the End
Chucky can be adapted to almost any cosplay skill level.
A beginner can create the character with striped clothing, blue overalls, red hair, freckles, bright blue eyes, and a mischievous expression. Intermediate cosplayers can customize the Good Guy outfit, style the wig, and add controlled scars and damage.
Advanced creators can introduce custom prosthetics, reconstructed facial sections, mismatched eyes, exposed stuffing, doll joints, and a complete packaging display.
No matter which version you choose, the strongest Chucky cosplay preserves the contrast that makes the character memorable: a colorful, friendly-looking toy hiding something much more dangerous.
Popular on the Blog:
- 10 Spooky Halloween Characters to Cosplay This Year
- Crossroads Pretty Boy Cosplay Guide (Junji Ito) | Mitsuo Mori Look
- Enid Sinclair Cosplay Guide: Outfit, Hair, Nails, and Eye Contacts from Wednesday
- Zhongli Cosplay Guide: Recreate the Geo Archon from Genshin Impact
- Snow White Cosplay Guide: Recreate the Classic Disney Princess Look


Your Friend to the End
No matter which version you choose, the strongest Chucky cosplay preserves the contrast that makes the character memorable: a colorful, friendly-looking toy hiding something much more dangerous.