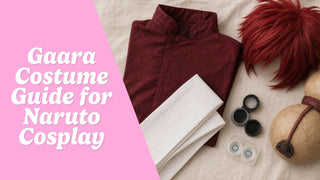
Gaara is one of the most visually distinctive characters in Naruto. His short red hair, pale eyes, dark eye markings, forehead symbol, desert-inspired clothing, and enormous sand gourd create a look that anime fans can recognize almost immediately.
His different appearances also give cosplayers several ways to approach the character. A beginner can assemble Gaara’s early-series look using layered burgundy clothing, a white sash, red wig, dark makeup, and a lightweight gourd. More experienced cosplayers can sew his full outfit, construct a secure prop harness, recreate his Kazekage robes, or design a partial transformation inspired by Shukaku.
A successful Gaara costume is not only about copying his clothes. His posture, expressions, and movements should reflect the specific stage of his story you want to portray. Early Gaara is isolated, volatile, and deeply suspicious of others. Kazekage Gaara is calm, observant, and committed to protecting the village that once feared him.
Choosing your version before you begin will help the costume feel cohesive from the gourd and clothing to the makeup and poses.
Who Is Gaara?
Gaara is a shinobi from Sunagakure, the Village Hidden in the Sand. Shukaku, the One-Tailed Beast, was sealed inside him when he was born, making Gaara a jinchūriki.
Although this gave him extraordinary power, it also caused the people around him to fear and reject him. Gaara grew up isolated from his village and unable to trust the people closest to him. The official Naruto site describes him as a child who was ostracized as a living weapon before eventually becoming the protector of the Hidden Sand.
His sand can automatically protect him from danger, even when he does not consciously command it. He also carries a large gourd filled with sand that he can use for defensive barriers and devastating attacks. His mastery of sand makes him a particularly difficult opponent during the Chūnin Exams, including his memorable battle with Rock Lee.
When Gaara first appears, he believes that his life has meaning only when he fights for himself. He is guarded, emotionally detached, and capable of extreme violence. His confrontation with Naruto becomes a turning point because Naruto understands the loneliness of being feared for carrying a tailed beast.
Gaara gradually begins using his power to protect other people instead of proving his own existence. He eventually becomes Kazekage and earns the respect of the village that once treated him like a threat. He later serves as a military leader during the Fourth Shinobi World War, commanding the Fourth Company against powerful revived opponents.
That transformation is central to portraying Gaara thoughtfully. An early-series cosplay should feel tense, watchful, and unpredictable. A Kazekage interpretation should communicate quiet authority, maturity, and responsibility.
Understanding Gaara’s Signature Look
Gaara’s clothing changes throughout Naruto, but several details remain closely associated with him.
His hair is short, spiky, and red or auburn. Dark rings surround his pale aqua or blue-green eyes, giving him a constantly exhausted and intense expression. A red kanji meaning “love” appears on the left side of his forehead.
The large sand gourd carried on his back is one of his most recognizable accessories. It is secured with a wide white sash or harness and contains the sand he uses in battle.
His early clothing relies heavily on dark red, brown, black, cream, and white. These muted desert colors help his red hair and pale eyes remain visually prominent. His later Kazekage clothing becomes more formal and structured, reflecting his position as the leader of the Hidden Sand Village.
When simplifying the costume, prioritize the red hair, dark eye makeup, forehead symbol, white sash, and gourd. These details will communicate Gaara more clearly than reproducing every seam of the outfit.
Choosing Which Gaara Costume to Create
Gaara appears in several different designs across the series. The Chūnin Exams outfit is the most recognizable choice, but his later costumes offer more options for experienced cosplayers and group presentations.
Chūnin Exams Gaara
Gaara’s early-series appearance is the best starting point for most cosplayers. It combines dark red and brown clothing with a wide white sash, shinobi sandals, short red hair, dark eye markings, and his large sand gourd.
This version captures Gaara before his emotional transformation. His expressions and posture should feel controlled but unsettling, as though his calm exterior could change without warning.
A beginner can assemble the costume from loose clothing and fabric wraps. Intermediate cosplayers can sew the tunic, build a fitted harness, and create a more accurate gourd. Advanced builders can reproduce the complete outfit and add suspended sand effects.
Kazekage Gaara
Gaara’s Kazekage appearance reflects his growth into a respected leader. His clothing becomes more formal, layered, and structured, often using deep burgundy, grey, black, cream, and other earth tones.
A Kazekage hat, formal robe, layered collar, or village symbol can help establish his position. This version is particularly well suited to experienced sewists who enjoy working with flowing panels and structured outerwear.
The facial details remain important, but the performance should change. Kazekage Gaara is no longer driven by the need to intimidate everyone around him. His stillness should feel deliberate, calm, and authoritative.
Fourth Shinobi World War Gaara
A war-era Gaara costume combines his mature design with practical battle clothing and the presence of a military leader.
This version works well for action-focused photoshoots and group cosplay involving other Kage, members of the Allied Shinobi Forces, or the Sand Siblings.
The clothing and gourd should allow a wide range of movement. Test the costume while crouching, raising your arms, and turning your torso before adding rigid details.
Casual Gaara
A casual or closet-cosplay interpretation can use a dark red hoodie, burgundy sweater, brown trousers, white scarf or sash, and a smaller gourd-shaped backpack.
Complete the look with red hair, the forehead symbol, and dark eye makeup. These facial features are especially useful when the clothing is simplified.
This version should be presented as a Gaara-inspired outfit rather than a screen-accurate recreation. It is a practical option for casual fan events, warmer conventions, and last-minute Halloween plans.
Shukaku Transformation Gaara
An advanced costume can explore Gaara’s partial transformation into Shukaku.
One side of the face, shoulder, or arm can use tan textures, dark markings, clawed fingers, and sand-like prosthetic details. Another interpretation might add a large tail, sculpted ears, or illuminated eyes.
Gaara’s early transformations are connected to the unstable power of Shukaku, whose influence becomes more visible when Gaara’s emotions and chakra spiral out of control.
A transformation costume should remain lightweight and easy to control. Large tails and creature elements need to detach for transportation and crowded spaces. Masks, prosthetics, and facial pieces should never obstruct vision or breathing.
Creating a Beginner Gaara Halloween Costume
A beginner-friendly Gaara costume does not require custom sewing. The main goal is to reproduce his colors, facial details, and recognizable accessories.
Useful materials include:
- Dark red, rust, burgundy, or brown tunic
- Brown or black trousers
- Black fitted shirt or mesh-style underlayer
- Wide white fabric sash
- Black open-toe shoes or shinobi-style sandals
- Short red or auburn wig
- Red cosmetic product for the forehead symbol
- Black, brown, or charcoal eye makeup
- Optional pale aqua colored contacts
- Lightweight gourd or gourd-shaped backpack
Begin with a loose dark red or brown top. A long tunic, oversized sweater, or simple costume shirt can create the right silhouette. Pair it with fitted or tapered trousers in a darker shade.
Wrap white fabric across the torso and shoulder to represent the sash supporting Gaara’s gourd. Secure it with hidden safety pins, snaps, or hook-and-loop tape rather than relying on one loose knot.
The gourd can be simplified into a painted backpack or lightweight foam prop. Even a smaller version will make the costume much easier to recognize.
Complete the look with Gaara’s red hair, forehead symbol, dark eye makeup, and optional pale colored contacts.
Building a Gaara Closet Cosplay
A closet cosplay can begin with clothing you may already own.
Combine a burgundy hoodie, sweater, or long-sleeve shirt with dark trousers. Wrap a cream or white scarf around the torso to suggest Gaara’s harness. Black boots or open-toe shoes can replace exact shinobi sandals.
A tan backpack can become a functional version of the sand gourd. Add removable brown markings, cracks, or fabric panels so the bag can return to normal after the event.
Because the outfit is simplified, the makeup and hairstyle become particularly important. Gaara’s red hair, forehead symbol, and heavy eye markings should make the character readable even without an exact tunic.
Creating an Intermediate Gaara Cosplay
An intermediate Gaara costume can introduce custom sewing, structured accessories, and a more secure gourd harness.
The tunic should be shaped enough to look intentional while leaving room for movement. Hidden stretch panels beneath the arms or along the sides can prevent pulling when you reach toward the gourd.
Instead of wrapping a long piece of loose fabric around the body, construct the white sash as a fitted harness. Wider straps will distribute the prop’s weight more comfortably than narrow bands.
Use snaps, adjustable buckles, or hook-and-loop closures so the harness can be tightened while worn. The gourd should attach with hidden clips and remain removable.
Intermediate cosplayers can also create custom trousers, shinobi-style footwear, and lightweight sand streams that attach to the hands or gourd.
Building an Advanced Gaara Cosplay
An advanced Gaara costume should focus on construction quality, mobility, and weight distribution.
Begin with references from one specific episode, arc, or design. Gaara’s clothing changes throughout the series, so mixing several versions may create a costume that feels inconsistent.
Experienced sewists can draft his Chūnin Exams outfit or build layered Kazekage robes with structured collars, long panels, and carefully finished edges. Fabric should maintain its shape without becoming overly heavy or warm.
The gourd should remain hollow. Internal clips and padded straps can distribute the weight across both shoulders and around the torso. No single strap should carry the entire prop.
A competition presentation could include removable sand streams, a transforming arm, illuminated details, or a reveal inspired by Shukaku. These pieces should attach securely but release quickly when the wearer needs to move through a crowd.
Test the costume without decoration first. Sit, walk, crouch, turn, and remove the gourd before finishing the paint, weathering, or prosthetic work.
How to Make Gaara’s Sand Gourd
The sand gourd is the largest and most recognizable part of Gaara’s costume. It is also the piece most likely to become uncomfortable when constructed without a plan.
A beginner version can be made from two lightweight round forms joined together. Foam shapes, hollow plastic containers, cardboard structures, or papier-mâché shells can provide the base.
Cover the structure with paper, thin foam, or fabric to create a consistent surface. Paint it tan or sandy brown, then add darker cracks and markings. A removable cork or cap can be added near the top.
Intermediate builders can create the shape from EVA foam over a hollow internal frame. Foam clay can smooth seams and add raised texture without significantly increasing the weight.
The gourd should attach to the costume through clips or buckles rather than being permanently sewn to the sash. A detachable prop will make it easier to travel, sit down, enter narrow rooms, and take breaks.
Never fill the gourd with real sand. Even a small amount can make the prop unexpectedly heavy. Fabric, foam particles, ribbons, and digital effects can suggest sand without adding dangerous weight.
Pro Tip: Reduce the gourd slightly from its animated proportions unless you are building it for a controlled stage presentation. A smaller prop will remain recognizable while being much easier to wear at a crowded convention.
Creating Gaara’s Forehead Symbol
The red kanji on Gaara’s forehead means “love.” It reflects his early belief that he could survive only by loving himself and fighting for his own existence.
Understanding that meaning is important. The symbol should not be treated as an interchangeable decorative mark.
Use red face paint, cream makeup, eyeliner, or a temporary cosmetic transfer. Do not use permanent marker, acrylic paint, or another product that is not designed for skin.
Practice the shape before the event. A stencil can help maintain the proportions, particularly when applying it while looking into a mirror.
Add the symbol after completing the complexion makeup but before applying setting spray. Keep the same red cosmetic product in your repair kit because the mark may fade beneath the wig or through normal movement.
Gaara’s Dark Eye Makeup
The dark markings around Gaara’s eyes are one of his defining facial features. They should look heavy and sleepless rather than like polished evening makeup.
Begin with black, dark brown, charcoal, or deep plum eyeshadow. Blend the color across the upper lid and concentrate additional pigment beneath the lower lash line.
Extend the shape slightly around the eye socket to create a more stylized anime effect. Keep the edges less polished than a traditional smoky eye, but blend enough that the makeup does not appear accidentally smudged.
Early-series Gaara can support a darker, more intense shape. A Kazekage version can use the same rings with softer shading and cleaner edges.
Use only products approved for the eye area. Avoid placing face paint, craft pigments, or unapproved cosmetics directly on the waterline.
Set the makeup carefully and carry a small brush or sponge for touch-ups during a long event.
Choosing Colored Contacts for Gaara
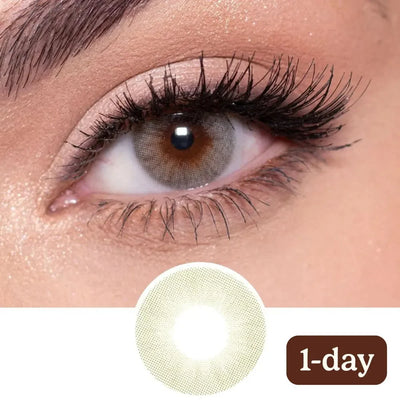
Gaara is usually depicted with pale aqua, mint, blue-green, or turquoise eyes. Colored contacts can emphasize the contrast between his light irises and dark eye markings.
A pale aqua lens will create one of the most recognizable anime-inspired effects. Light turquoise, sea-green, or blue-grey can also work depending on your chosen reference and natural eye color.
Consider how the color will appear indoors. A subtle lens may look natural in daylight but disappear under convention lighting. A brighter or more opaque design can remain visible in photographs.
Insert colored contacts before applying eye makeup. This reduces the chance of transferring dark eyeshadow, eyeliner, loose powder, wig fibres, or cosmetic residue onto the lens.
All colored and decorative contacts are medical devices, including lenses without vision correction. In the United States, they require a valid prescription and proper fitting by an eye care professional.
Follow the cleaning, wearing, replacement, and storage instructions provided for your lenses. Never share contacts, rinse them with tap water, or sleep in them unless they were specifically prescribed for that type of use.
Remove the lenses immediately if you experience pain, redness, discharge, sensitivity to light, or changes in vision.
Colored contacts are optional. Gaara remains recognizable through his red hair, eye makeup, forehead symbol, clothing, and gourd.

Styling a Gaara Wig
Gaara’s hair is short, spiky, and red. Depending on the adaptation and lighting, the color may appear bright red, auburn, rust, or deep copper.
Choose a short wig with enough length at the crown to create separated spikes. A wig that begins slightly longer than the desired finished style will give you more control during trimming.
Use small vertical cuts rather than cutting straight across the ends. This creates a more natural anime texture.
Separate the spikes with lightweight wig product. Avoid coating the entire wig until it becomes one solid shape. Gaara’s hair should appear sharp and textured while retaining some movement.
A bright red wig will create a more dramatic anime look. Auburn or rust may feel more realistic and blend naturally with the desert-inspired palette.
Cosplayers with naturally short red or auburn hair may only need styling product. Other hair colors can also work when the costume’s facial details and gourd are clearly present.
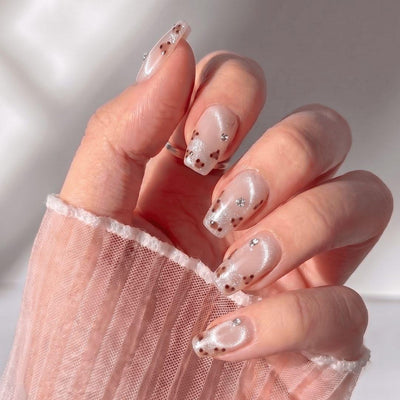
Gaara-Inspired Nail Colors and Nail Art
Gaara-inspired nails can draw from desert landscapes, windblown sand, and the colors of the Hidden Sand Village.
Matte tan, terracotta, rust, dark brown, black, cream, and muted gold all fit naturally into the palette. A red accent nail can reference Gaara’s hair or forehead symbol.
Speckled polish and textured finishes can resemble sand or stone. A glossy curve placed over a matte tan base may create the impression of wind moving across a dune.
The kanji for “love” can appear on one accent nail when copied carefully. Other ideas include small gourd designs, desert clouds, cracks, swirling sand, and the Hidden Sand symbol.
A Kazekage-inspired manicure could use burgundy, black, cream, and gold. Fine metallic lines and a village-symbol accent will give the set a more formal appearance.
Short square, squoval, or almond nails will remain practical for fastening the gourd harness and handling props. Longer pointed nails can complement a partial Shukaku transformation.
Gel nail stickers can make it easier to add cracks, sand patterns, symbols, and clouds without hand-painting each nail.

Creating Safe Sand Effects
Sand effects can make Gaara’s poses more dynamic, but real sand is rarely practical for a costume event.
For a simple effect, use tan ribbon, sheer fabric, tulle, or lightweight paper attached to a hidden handle. Curve the material around the arms or allow it to extend from the opening of the gourd.
Foam clay or upholstery foam can be shaped into more structured sand streams. Paint the surface with several shades of tan, brown, and muted gold so it does not appear flat.
Transparent thermoplastic can create a lightweight suspended structure. Cover it with textured paint and attach it to the wrist, hand, or gourd through a removable connector.
Loose powder, glitter, confetti, and real sand should not be released inside convention venues. They can create slipping hazards, damage equipment, enter contact lenses, and become difficult for staff to remove.
Large sand clouds and storms are often best added through photography and editing after the event.
Gaara Costume Props
The gourd will usually be enough to complete the costume, but a few additional props can support a particular version.
A Kazekage hat, Hidden Sand headband, scroll, village document, or lightweight sand shield can add context.
A partial Shukaku costume might include a clawed glove, tail, textured shoulder piece, or transformed arm. These additions should remain flexible and short enough to avoid hitting other attendees.
For a casual cosplay, a gourd-shaped backpack can function as both a prop and storage. It can carry your phone, wallet, makeup, contact lens supplies, and repair materials.
How to Pose Like Gaara
Gaara’s posture should reflect the stage of his story you are portraying.
Early Gaara often appears closed off and guarded. Keep the shoulders slightly forward, cross the arms, or hold the hands close to the body. Direct eye contact and minimal facial movement can create intensity without exaggerated aggression.
Raise one hand slowly as though controlling sand. Gaara’s movements should feel deliberate and efficient rather than frantic.
For a defensive pose, position a sand-effect prop between your body and the camera. This can suggest the automatic sand shield that protects him.
Kazekage Gaara should appear calmer and more authoritative. Stand upright, keep the chin level, and use controlled hand positions. His confidence comes from leadership rather than intimidation.
A Shukaku transformation can use a wider stance, clawed hands, and more forward-leaning posture. Keep large costume pieces and movements under control around other people.
Gaara Group Cosplay Ideas
Gaara works particularly well alongside Temari and Kankurō as the Three Sand Siblings. Their different weapons, clothing, and personalities make the group immediately recognizable.
A Naruto and Gaara pairing can emphasize the similarities and differences between their experiences as jinchūriki. Early-series versions can recreate their conflict, while later costumes can focus on mutual understanding and respect. VIZ’s official volume summary highlights how Naruto comes to understand and sympathize with Gaara during their confrontation.
A Five Kage group can place Kazekage Gaara alongside the Hokage, Raikage, Mizukage, and Tsuchikage. His formal robes and calm posture work especially well in a leadership-focused group.
Other possibilities include Hidden Sand shinobi, Allied Shinobi Forces, Akatsuki rescue-arc characters, or a group of jinchūriki.
Creating the Costume Respectfully
Gaara can be portrayed by cosplayers of any race, complexion, or background.
Focus on his clothing, hairstyle, makeup, gourd, and village symbols. Do not change your skin tone or attempt to imitate ethnic features.
Draw the forehead kanji carefully because it has a specific narrative meaning. Avoid replacing it with a vaguely similar design or using unrelated Asian characters only because they look decorative.
The shinobi headband and Hidden Sand symbol should also match the selected version. Symbols from different villages are not interchangeable.
A thoughtful costume recreates the character’s design while respecting the meaning attached to its symbols.
Making a Gaara Costume Comfortable
The gourd requires the most practical planning.
Test the harness with the complete costume and wear it around your home before the event. The weight should be spread across both shoulders and, when possible, around the torso.
Use wide straps with padding rather than narrow bands that dig into the body. Check the placement of buckles and clips so they do not press against the ribs or shoulder blades.
Make sure you can remove the gourd without assistance. It may need to come off before sitting in a car, entering a crowded room, using the restroom, or taking a break.
The tunic and trousers should allow walking, crouching, and kneeling. Shinobi sandals can be adapted over supportive black footwear rather than worn as thin costume soles.
Carry a small repair kit with red face paint, dark makeup, wig pins, safety pins, spare harness clips, adhesive, and gourd touch-up paint.
Common Gaara Costume Mistakes
A general burgundy ninja outfit may not be recognizable without Gaara’s key details. The red hair, dark eyes, forehead symbol, white sash, and gourd should remain prominent.
The gourd should never be filled with real sand or constructed from unnecessarily heavy materials. A hollow prop will look just as effective while being much safer.
Gaara’s eye makeup should appear dark and tired rather than like a perfectly blended evening look. Keep the shape connected to his character design.
The forehead symbol should be reproduced accurately and with an understanding of its meaning.
Another mistake is portraying Gaara only as violent or emotionless. His story is defined by personal growth. A Kazekage cosplay should communicate calm authority, loyalty, and compassion rather than repeating the behavior of his early-series appearance.
Final Gaara Costume Checklist
Before heading to your Halloween event or convention, check that you have:
- Dark red, burgundy, rust, or brown tunic
- Dark trousers and fitted underlayer
- Wide white sash or supportive harness
- Shinobi sandals or comfortable black footwear
- Lightweight hollow sand gourd
- Short red or auburn wig
- Dark eye makeup
- Red forehead symbol
- Optional pale aqua or blue-green colored contacts
- Gaara-inspired nail design
- Optional sand-effect prop
- Makeup, harness, and costume repair supplies
Protect the Hidden Sand
Gaara is a strong costume choice for beginners and experienced cosplayers because his design can be simplified without losing its identity.
A beginner can create his early-series appearance with burgundy clothing, a white sash, red wig, dark eye makeup, forehead symbol, and lightweight gourd. Intermediate cosplayers can sew the tunic, construct a secure harness, improve the wig styling, and add convention-safe sand effects.
Advanced creators can recreate his Kazekage robes, build a detailed hollow gourd, develop a partial Shukaku transformation, or create a performance reflecting different stages of his story.
The strongest Gaara cosplay captures more than the red hair and sand abilities. It reflects his journey from an isolated child who believed he could rely only on himself to a leader willing to risk everything to protect his village.
Related Reading
- Using Accessories to Make a Character Your Own
- Cosplay Nail and Makeup Tips
- Arataki Itto Cosplay Guide
- Asta Cosplay Guide: Black Clover
- Barbara Cosplay Guide: Genshin Impact


Command the Sand and Protect the Hidden Sand
The strongest Gaara cosplay captures more than the red hair and sand abilities. It reflects his journey from an isolated child who believed he could rely only on himself to a leader willing to risk everything to protect his village.